Thanks for the Transparency
When I started endeavoring to figure out how exactly to go about making the images I have always wanted to try my hand at (but had never quite gotten around to committing to) a little over a year ago, I began a compelling journey. I hope to be able to continue that journey (with any luck) for a long time to come. I quickly realized how rich the online photographic community was. The phrase treasure trove comes to mind. The myriad photographic and multi-media resources available really showed just how valuable an educational tool the web can be as well as driving home the importance of community (both online and off) and the power of transparency.
My journey started simply by looking at the works of photographers I was familiar with and quickly led into the world of those with whom I was unfamiliar: Richard Avedon, W. Eugene Smith, Herb Ritts, Irving Penn, Eddie Adams, Alfred Eisenstaedt, Ansel Adams, Henri Cartier-Bresson, Robert Capa, Annie Leibovitz and others led to David Turnley, David Burnett, Joe McNally, Todd Heisler, Bob Krist, Vincent Laforet, Chase Jarvis, Joey L., Zack Arias, David Hobby, Scott Kelby, the list goes on…. Each day a new artist would reveal him or herself through the interwebs and I would look, marvel, listen and examine the various philosophies and approaches each amazing artist after the next had shared through their website or blog.
Throughout my searches there was always one overwhelming question that presented itself: how do they do that?! (Especially as it relates to the use of Speedlights and strobes, both in and out of the studio.) This culminated, as it was sure to do, in the discovery of the work and blog of Chase Jarvis, amazing photographer, ever present photographic web guru and proclaimer of the power of sharing and the value of transparency. So refreshing was the discovery of behind the scenes techniques by Chase as well as other artists like Vincent Laforet, Joey L., Zack Arias and the brothers Owyoung (Todd and Chris) that I was encouraged to take calculated steps in attempting to try my own hand at some of the techniques they were sharing. Those discoveries led me to attend my first Photo Plus Expo in NYC last month where I was fortunate to attend a workshop by Zack Arias. At the workshop I finally got to see some of what I had been reading on blogs and watching on video come to life right in front of me. To say that Zack’s presentation was enlightening would not only be a bad pun, but also a huge understatement. He is not only a multi-talented photographer, but a great teacher as well, and watching as he explained the various ways he uses a roll of some white seamless background paper and a few lights to stunning effect I felt as if a secret door had been opened. The workshop exceeded all expectations. Inverse square law? What’s that you say? Throughout his two hour presentation the law was illustrated clearly, and though I’m still not sure of the various algorithms and equations involved, the general principle sunk in. I made a commitment to myself then and there to give some of these techniques a shot when I returned home. That seminar is what precipitated this post.
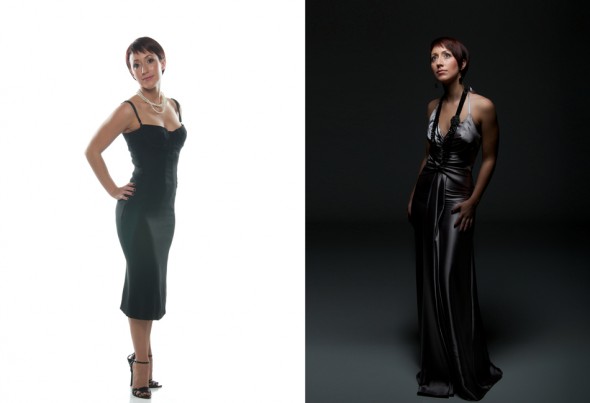
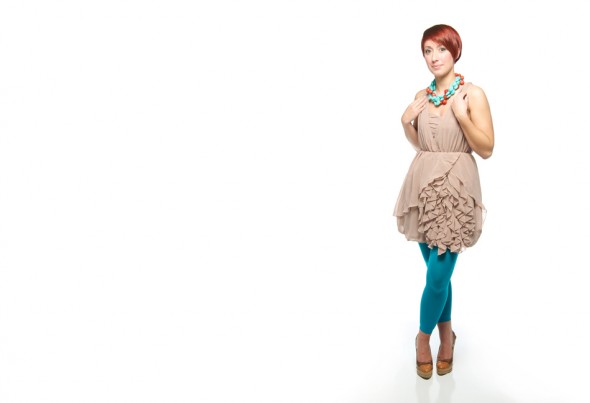
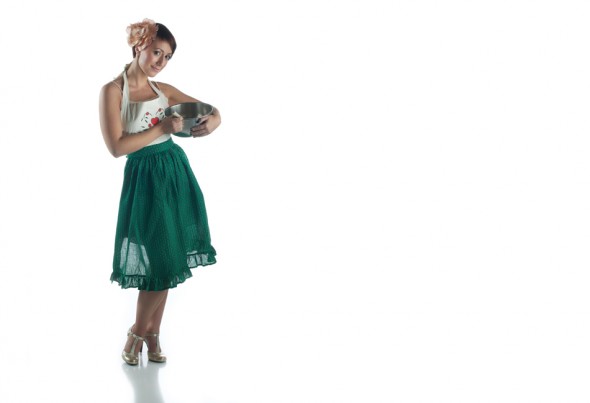
While at his Photo Plus Expo seminar, “The Many Uses of White Seamless,” a question that was asked more than once was: can this be done with Speedlights? The answer was a resounding yes (Zack is known for his belief that it’s not about the fiddle, it’s about the fiddler), but with some caveats; those being that it would be more difficult to bring the background to a true white and there might be more cursing and potential aggravation because of the lower power of the lights as a result. I decided to attempt a shoot using first Speedlights (2 SB-900s on the background and 1 SB-600 on the subject), then studio strobes (3 Alien Bees 800’s) to compare and contrast the results and experience. The challenge had also gone out from Zack asking that we try placing 2 Speedlights in umbrellas behind (and facing) the model, in order to play with the wrap that results from that lighting set up. These are the results of that test and my response to that challenge. I also created a behind the scenes video that will hopefully help illustrate some of the lessons I learned from this experience. For the final images from the shoots please visit my flickr page here. Also be sure to check out Zack Arias’s entire tutorial on white seamless on his blog here. It spells everything out clearly and is a fantastic resource.
It was definitely more challenging, especially in the editing phase, with the Speedlights, and at the very end of the shoot one of the SB-900s did overheat even though I had an SD-9 attached (have to check the firmware on it). That being said, I think the exercise proved the results can be quite favorable with a Speedlight only configuration. Can you tell which one is which? I’d love to hear your thoughts, suggestions, criticisms…the two shoots can be differentiated by the hair color of the fantastic model (as well as talented photographer), Michelle – her website is here.
Three weeks ago I had no idea that through the use of light I could use one white background to create such different atmospheres. I can only imagine what I might learn tomorrow. If the talented and generous artists mentioned earlier (as well as the many more I have yet to discover) continue to live out their passions and share their visions transparently with the world then the possibilities are endless.
Until next time – CSH


I’m experimenting with a different approach: white fabric hung about 4′ from a back wall and two AB800s flashed at the white wall to bounce into the fabric for a total white background, sort of like a giant back lit softbox.
I had a problem with dingy tones in the corners and got tired of editing them so I hung sheets of aluminum foil in front of the wall and that seems to work.
Steve